
Wheelbuilding Part 3: Tensioning and Truing
- Dec 15, 2022
- 5 min read
Note: most of the images below are not mine. I got them from the Park Tool website. Borrowed images are linked to their source.
Bringing the spokes up to tension and rounding out the wheel is a slow process! I've been getting some excellent guidance from the lovely folks over at Camden Cycles in North Minneapolis. Twice a month, they host "Open Shop" where anyone can come use tools and learn how to work on their bike for free. (They also provide free food and childcare for those that need it!)
Counterintuitively, spokes provide wheel strength by pulling the rim in towards the hub, not pushing it out. The spokes need to be sufficiently tight so that they don't buckle under the weight of the bike and rider, but not so tight that they snap. "Tensioning" the wheel refers to setting spokes to the right tension. Each spoke won't have exactly the same amount of tension, but they will be close. To increase spoke tension, you tighten the spoke nipple where the spoke connects to the rim. There is a nifty tool that you can use to measure tension of each individual spoke. It's called a "tensiometer," and I was able to borrow the tool from Camden Cycles.
"Truing" the wheel refers to making the wheel round. "Truing" and "tensioning" generally happen at the same time. This is because tensioning the wheel affects the true, and truing the wheel affects the tension.
There are three types of "roundness" to keep in mind when truing a bike wheel: lateral, radial, and dish. Lateral true is the side-to-side alignment; the rim should not wobble to the left and right as it spins:

Radial true is the roundness of the wheel; you want the wheel to be as close to a perfect circle as possible:

Finally, the "dish" is the centering of the hub between the two axles where it connects to the frame:

The difference between lateral true and dishing is confusing. However, it is possible to have a laterally true wheel, where the rimletely in line with itself, but the hub is off-center. If the hub is off-center, the rim will be too close to the frame on one side once you get the wheel onto the bike. In the images below, the wheel on the left is dished correctly, and the wheel on the right is not dished correctly.

This is a particular consideration with the rear wheel. Because the cassette (the gears) are attached to the rear wheel at the hub, the spokes appear to be off-center, even though the wheel itself is correctly dished. In the images below, you can see how the cassette changes the centering of the spokes. The image on the left is a front wheel which is basically symmetrical from left to right. The image on the right is a rear wheel. The green bar shows the width of the axle, with the ends showing where the axle connects to the frame. The rim needs to be centered in the middle of that green line so that the wheel is centered in the frame. The red and yellow lines show the difference in the distances between the hub flange (where the spokes connect to the hub) and the center of the wheel on either side.

This is why spoke length calculations are so important. For a rear wheel, the spokes on the gear side (drive side) are normally cut shorter than the spokes on the non-gear side (non-drive side). The distance between the hub flange and the rim is shorter on the drive side, and the spoke lengths need to reflect that. If the spokes were the same length on both sides, it would not be possible to dish the wheel correctly.
I decided to work on my front wheel first. Because front wheels are more symmetrical, they are easier to true. I started by just tightening up all of the spokes. In theory, with a good rim and the correct spoke lengths, the wheel will be true if you turn each spoke nipple exactly the same amount. (In practice, it almost never works that way.) But as a starting point, it's best to turn each spoke nipple until the spoke threads disappear, and then one full turn after that.
Once all of the spokes were slightly tighter, I started working on the lateral true. I used a fancy truing stand at Camden Cycles, which has adjustable guides that you can move around to find wobbles in your rim.
To use the truing stand, you move the guides as close to the rim as possible, until they just barely touch part of the rim as you turn the wheel. Next, you find the section of the wheel that is rubbing on the guides, and tighten or loosen the associated spokes to adjust. To move the rim closer to the right side, tighten the spokes on the right, or loosen the spokes on the left. Do the opposite to move the rim towards the left side.
Once I had made decent progress on the lateral true, I started working on the radial true. The method is the same, except that you move the truing stand guides to the outside of the rim. To bring a section of the rim closer to the hub, tighten the associated spokes. To move it farther away, loosen the associated spokes.
As you might have guessed, adjusting the radial true mucks up the lateral true. Therefore, it is necessary to flip back and forth between adjusting the two, getting the wheel as round and straight as possible. It's a fussy job that takes a lot of practice. (Which means that it takes me a long time, since I've never done it before.)
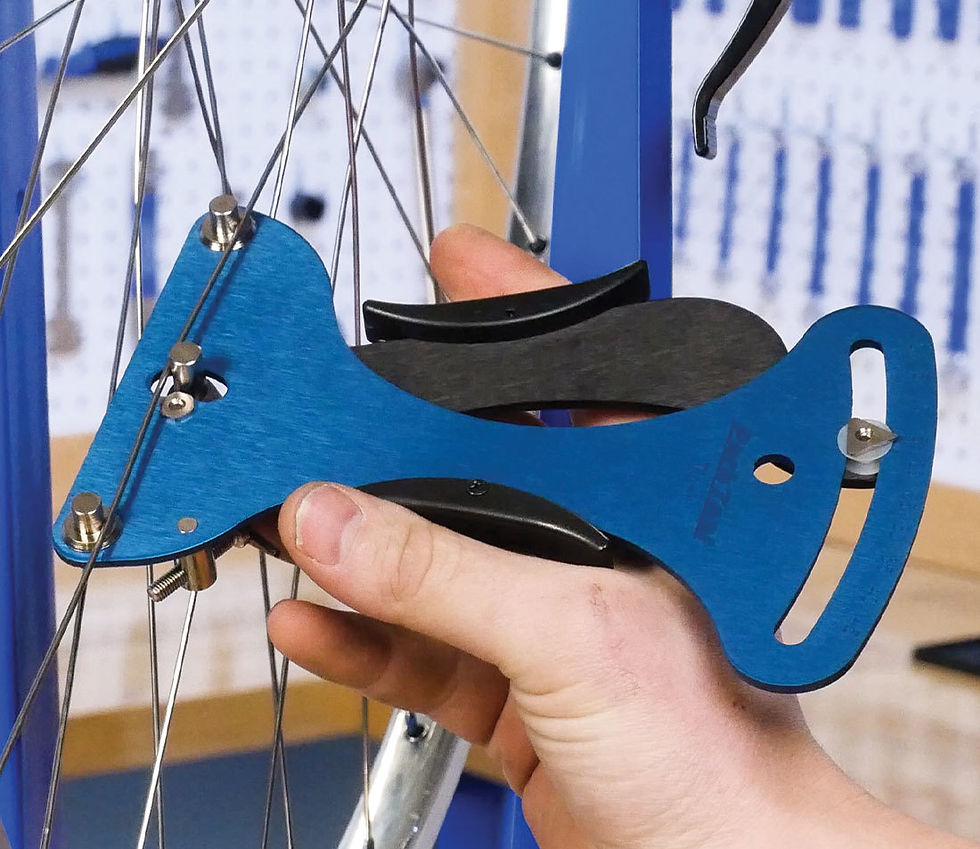
Once my lateral and radial true were in pretty good shape, I checked the dish using a dishing tool. The photo below shows a rear wheel, but the tool works the same on a front wheel: the tool contacts the outer edge of the axle and the rim on either side. You measure on both sides, and make sure the distances match.

I had pretty good luck with the dish on my front wheel. I didn't really have to make any adjustment, and could just move back to refining the lateral and radial true.
For my rear wheel, I started the tensioning and truing process at home using a low-budget "truing stand" that I made using my bike frame, a ruler, and a couple rubber bands.

The low-budget option was sufficient for coarse corrections, but I went back to Camden Cycles to use the better tool for the more refined corrections.
As expected, truing the rear wheel was much more difficult. At first, I was a bit concerned that I had swapped the drive side and non-drive side spokes when I laced the wheel, so I went in to adjust the dish right away. I was able to dish the wheel correctly, which meant that I had laced the wheel correctly (phew!).
Since I had tightened up the spokes so much while adjusting the dish, I had to go back and loosen all of the spokes to start working on the lateral and radial true. Then, the process was essentially the same as the front wheel. I kept making smaller and smaller adjustments, switching between radial and lateral true as I went.
Since I'm a beginner at this, I occasionally mixed up the direction that I was supposed to turn the spoke nipple to tighten or loosen the spoke. "Right-tighty lefty-loosey" doesn't work super well, because you're tightening from the back side of the nipple, so the directions are flipped.

Once I realized my mix-up, I had to go back and undo my work and redo it again. This has been the most frustrating part of the wheelbuilding process, in my opinion.
At this point, both of my wheels are almost done. I still need to make some truing adjustments, and then I'll need to "de-stress" the spokes. More on that later!


Comments