
Brakes Installation and Adjustment
- Apr 4, 2023
- 2 min read
Once I had cut the correct lengths for my brake cable housing and installed the cables, it was time to adjust the brakes.
The brake arms (called "cantilevers") are bolted to the bike frame via welded "braze-ons". (It's a good thing to have your brakes firmly attached to the frame!) My bike has "long-pull v-brakes," which are standard rim brakes for a touring bike. I was also able to re-use them from my old bike. (yay!) "Long pull" refers to the length of cable that is pulled when you squeeze the brake levers. Because of this, it's important to make sure your brake levers match your brake style, so the correct amount of cable is pulled.
First, I needed to make sure the brake pads contacted the wheel rim evenly, without rubbing against the tire. To do this, I loosened the bolt on the outside of the brake pad, and pressed the cantilever arm towards the wheel rim. I scooted the brake pad into the correct location, and then tightened the bolt. I did this on both sides of the rim for both the front and rear brake.

Next, I did a first pass at adjusting cable tension. The goal is to have it tight enough so that the brake pads are as close to the rim as possible (without touching them), so that the brakes engage quickly when the levers are squeezed. I manually squeezed the cantilever arms so that both brake pads contacted the rim, and then loosened my grip slightly. I clamped the cable down at this tension.

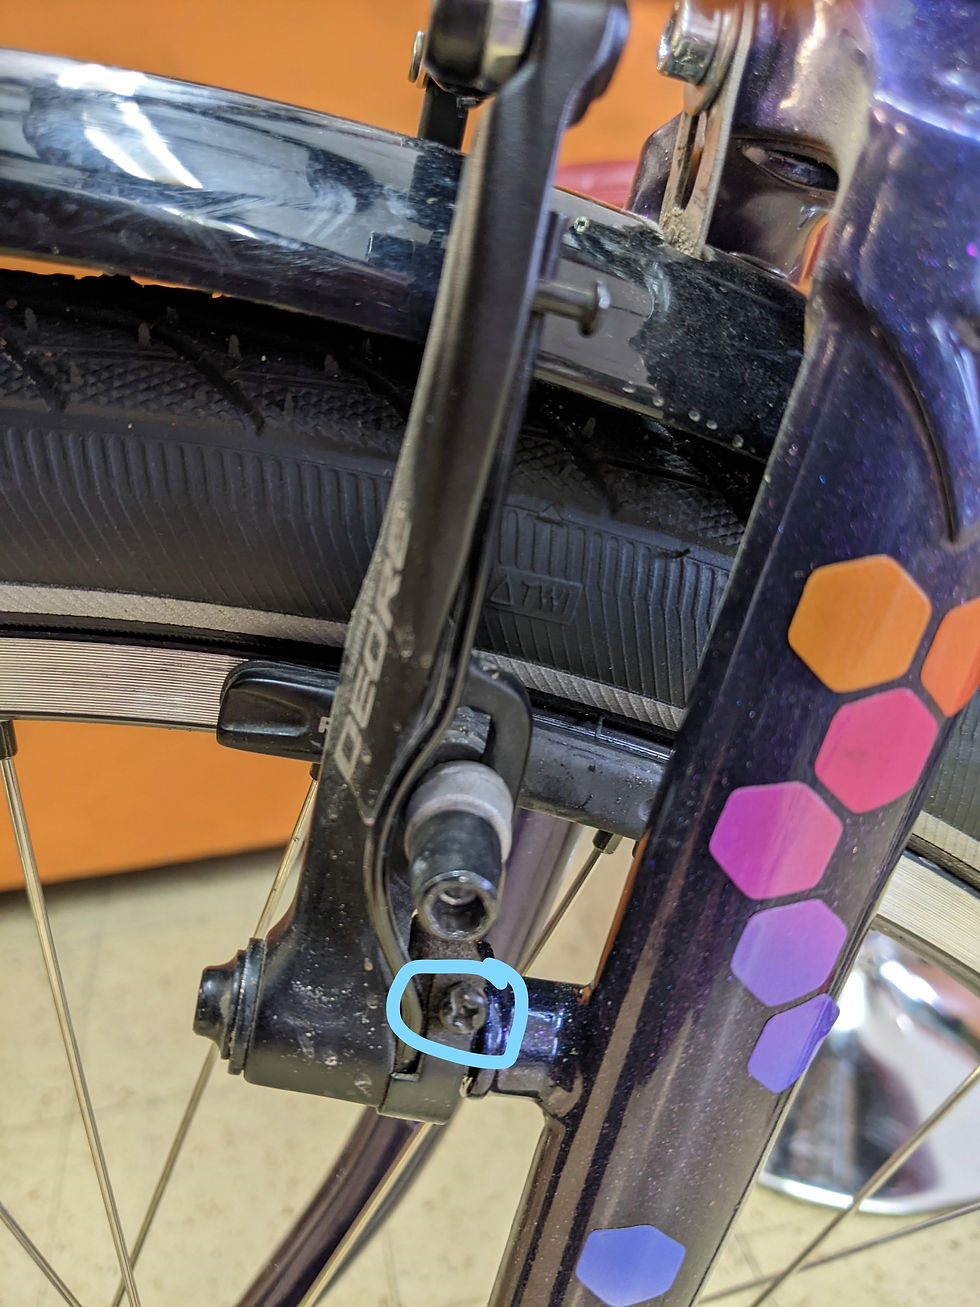
Next, I needed to adjust the centering of the brakes. That is, I needed to make sure that both brake pads were the same distance from the wheel rim. This style of v-brake has a little screw at the base of each cantilever that controls spring tension. To move the brake pad farther away from the rim, I tightened the screw. This increases spring tension, pulling it away from the rim. I did the opposite to bring the brake pad closer to the rim.
This adjustment is a little fussy, and it is often necessary to adjust cable tension at the same time. Once the adjustment was looking pretty good, I made smaller adjustments to the cable tension. The "noodle" that the brake cable runs through has a little "barrel-adjuster". Twisting the barrel adjuster increases cable tension just slightly. It is easier to make small adjustments this way than to futz with the end of the cable. I tightened it until the brake pads just barely touched the rim, and then loosened it until they stopped rubbing.

Once I was feeling pretty good about my cable adjustment, I cut the end of the brake cable and crimped on this cute orange cable end.

(I probably could've trimmed that cable a little shorter, but I can always make it shorter later!)


Comments