
We have handlebars!
- Feb 2, 2023
- 4 min read
The handlebar position isn't set in stone yet, but I've got them mounted on the bike. There are several parts that go into attaching a set of handlebars onto a bike.
First, arguably the most important part (yet the least visible) is the headset. This is a set of bearings that are installed at the head tube that allow the handlebars to swivel left and right. The headset is composed of two sets of bearings and cups that hold the bearings, a "crown race" that is mounted on top of the fork, and a cap and nut to hold the whole shebang together.

The first step is to press in the crown race and the cups that hold the bearings. This just means forcefully shoving the parts into the frame, in a controlled manner. Doing it without breaking the cups requires a very expensive tool. And, it only needs to be done once. If/when the headset needs servicing in the future, the bearing cups won't need to be removed or re-installed.
For this reason, I got a professional to install my bearing cups and crown race. The Hub Bike Co-op set me up with a new Cane Creek 40 headset, and did the cup and race install for me. They pressed the crown race into the fork, and pressed two bearing cups into the bike frame head tube: one on the top and one on the bottom.

Once this was done, I simply slid the first set of bearings onto the fork, slid the fork through the head tube, and then put the other set of bearings on top of the head tube. This is a modern style "threadless" headset. My old bike had an old-style threaded headset, so I'm still learning how this all fits together.
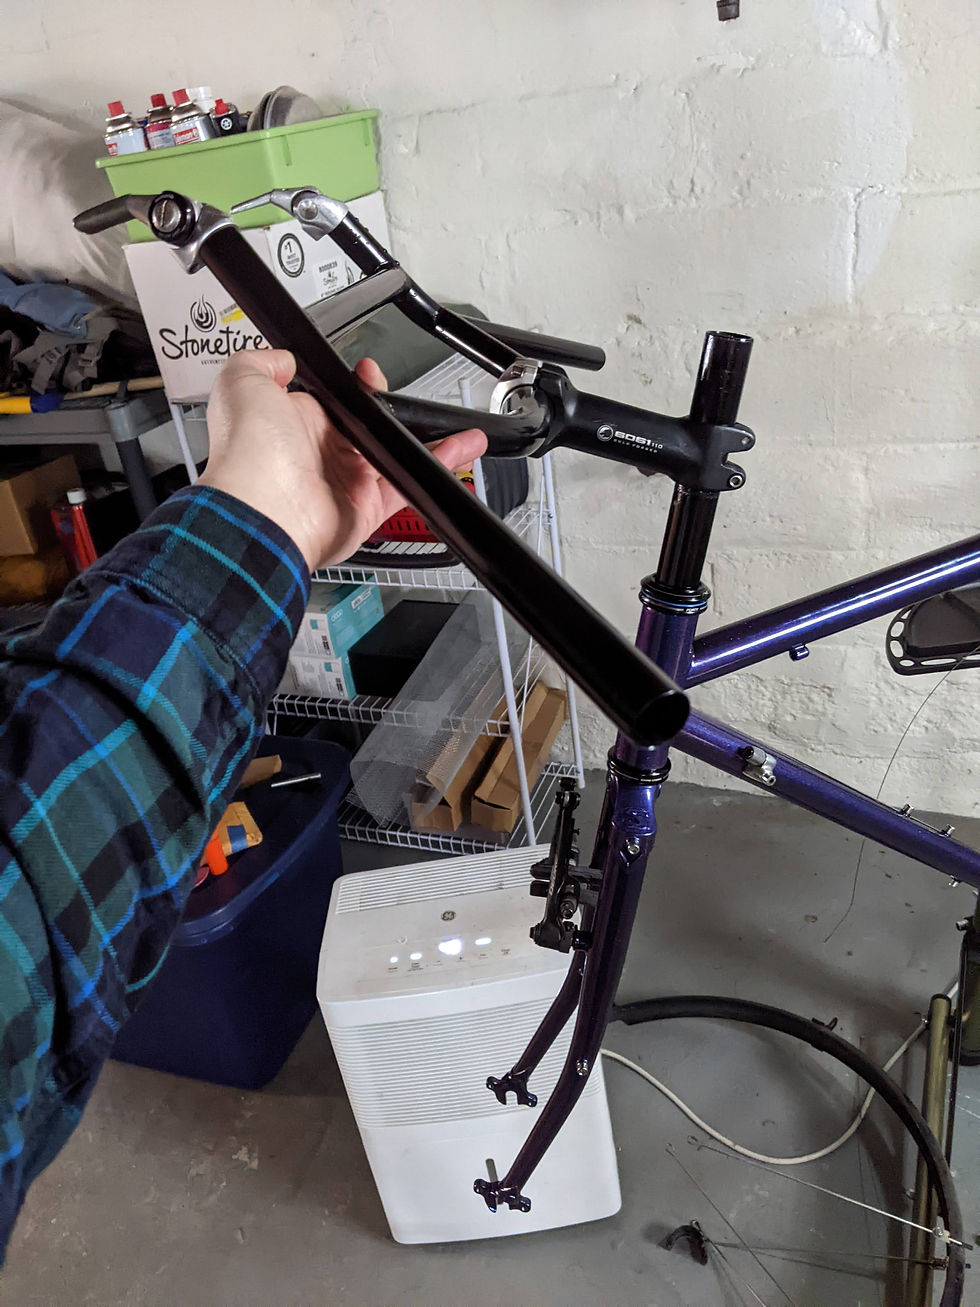
Next, the stem gets clamped onto the top of the fork. The stem clamps onto the fork on one end, and holds the handlebars on the other end.

Stems come in all sorts of lengths and angles. I'm going to have to try out different stem lengths before I find a fit that feels good. For a first shot, I grabbed a stem out of the used parts bin at The Hub. I think it's too long, but I'll wait to see how it feels when I get more parts on the bike. You'll also notice that the fork is really long, and there's a bunch sticking out at the top. Eventually, I'll need to trim the fork (yes, this means cutting the metal shorter) to a length that feels comfortable. I'll put spacers underneath the stem to set the stem at a comfortable height, and then trim off any extra from the fork. When I do this, I can finish the headset installation, which involves attaching the headset cap and nut. But I'll get to that later.
I've been thinking about handlebars for MONTHS. There are so many factors to consider: upright vs. bent over riding position, weight, aerodynamics, shifter type, number of different hand positions, and more. My old bike had bomb-proof old-style shifters called "bar-end shifters," and I wanted to keep those shifters for my new bike. So, I needed to make sure to choose handlebars that were compatible with this style shifter.
I knew I wanted flat bars (instead of classic road bike "drop bars") because I think it will be more comfortable for me. One of the main reasons for using drop bars is you can maintain a more aerodynamic riding position and go faster, but my goal is not to go fast, so that didn't matter as much to me. Flat bars make it easier to get a shorter reach (the distance between the seat and the handlebars), and my short torso makes this a necessity. The width and angle of flat bars also makes for a comfortable ride.
I originally thought I wanted butterfly bars (also known as "trekking bars"). This is an old European style handlebar that was designed for multiple riding positions, meaning that you can move your hands around to different locations throughout your ride. This helps prevent hand fatigue on long rides.

The main problem with butterfly bars, for me, is that it would be difficult to mount my bar-end shifters to them. I could put them at the ends of the tubes in the bars, but they would be awkward to reach. They might also bump into the stem. I could solve this by getting little adapters to mount my bar-end shifters on top of the handlebars, but the adapters are the same price as buying entirely new shifters.
So, I ended up choosing a neat set of flat bars called the Surly Moloko Bars. These bars are nice and wide, with multiple riding positions. They also have little "bull horns" at the top, where I can mount my beloved bar-end shifters. There is ample space for mounting all kinds off doo-dads on top of the bars, so I'll have plenty of space for my lights, speedometer, snack bag, and more.

And there you have it! In photo below, I clamped my stem up a bit higher, which gives you an idea of what it will look like once I add spacers.
You can also see my bar-end shifters, which I put on the ends of the bull horns. These shifters have an expanding bolt that clamps on to the inside of the bar.

I was delighted to find these child-sized bar grips at Camden Cycles when I was over there for open shop. Fortunately, my hands are small enough that they work for me, and they fit my aesthetic perfectly.
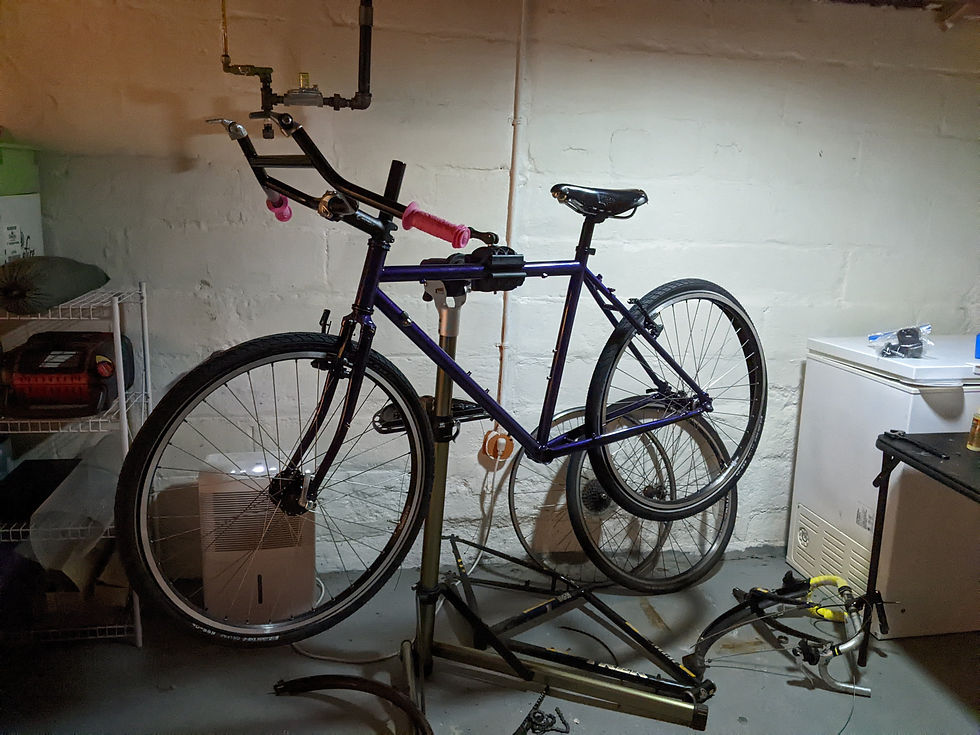
It's starting to look like a bike!


Comments