
Cockpit fitting: stem and handlebar height
- Mar 24, 2023
- 4 min read
This part is somewhat dependent on body geometry, and heavily based on personal preference. The goal is to set your "reach" (distance between your saddle and handlebars) and handlebar height to a position that works for your needs. I'm not concerned about going fast, but I am interested in being able to do long rides. So, comfort is my top priority.
I started by figuring out how to set a comfortable reach. I have a short body, which means that I also need a relatively short reach. Because I chose to use flat handlebars, this makes it easier to set a shorter reach. This is because flat handlebars swing back towards the saddle more than traditional drop bars.
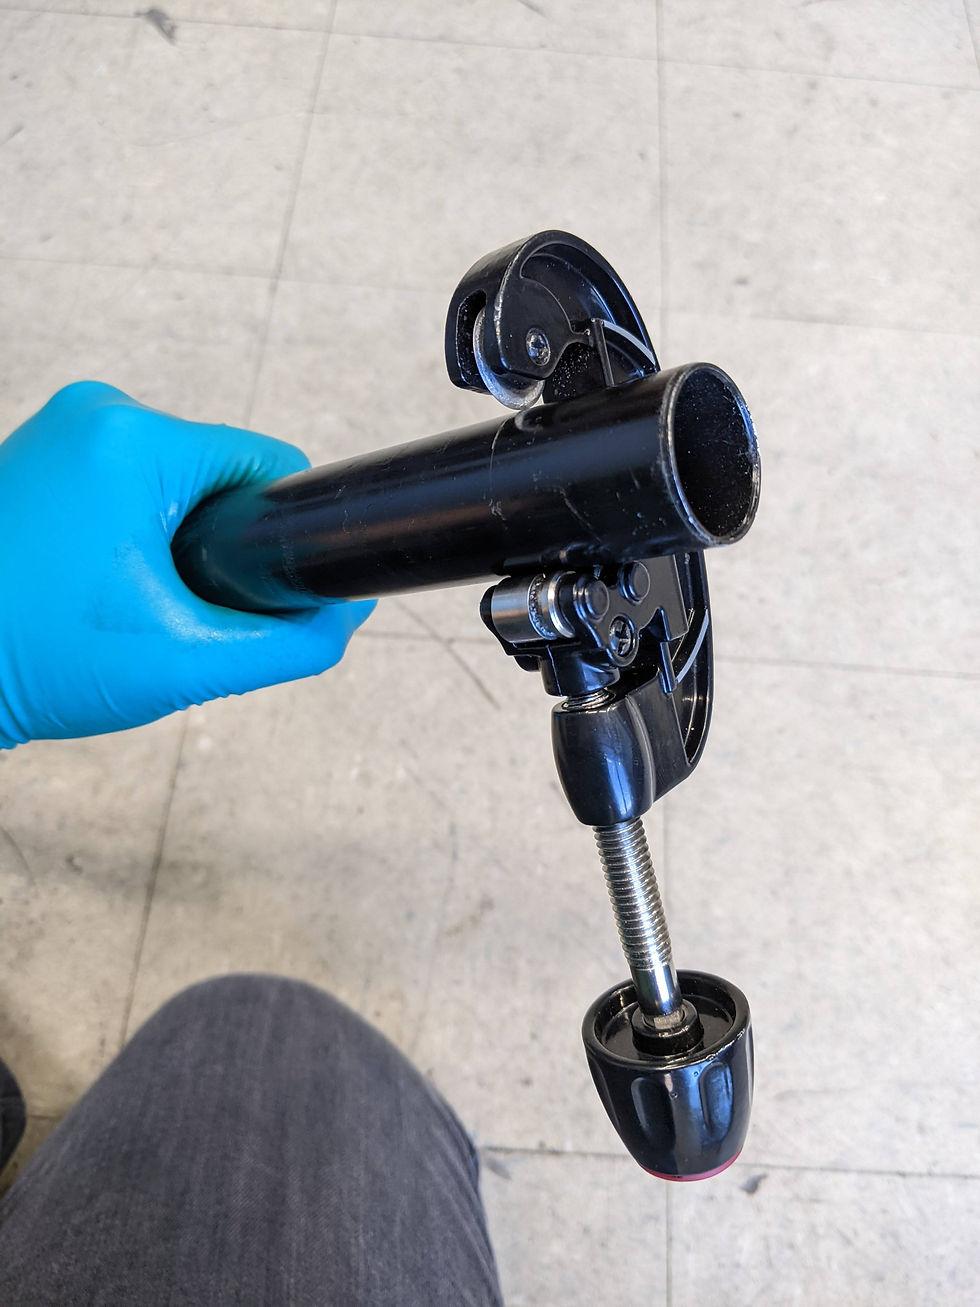
The "stem" is the part of the bike that connects the top of the fork (or the "steering tube") to the handlebars. The stem also controls how far forward your handlebars will sit. Therefore, a shorter stem = shorter reach, and a longer stem = longer reach. You may remember from my previous post that I started out with a stem I found in the used parts bin, thinking it was probably too long. I was right. When I sat on the saddle and put my hands on the handlebars, I felt stretched out, and it was uncomfortable to reach the "bull horn" ends of my handlebars. This stem was 110 mm long, and I knew I had to go shorter.

So, I ventured over to the Great Minnesota Bike Swap, which was a really fun gathering of bike enthusiasts who were selling bike parts, accessories, and unique builds. I found a shorter stem there (it was 90 mm), sold to me for less than 5 bucks.

To my dismay, this stem was also too long. I found myself wanting to lock out my elbows, a telltale sign that the handlebars were too far away. I am grateful to Camden Cycles for helping me out with this, because it has been hard for me to identify a comfortable reach. The reach on my old bike was far too long, so anything even remotely shorter than that feels great.
I was back on the hunt for an even shorter stem. Fortunately, I have learned that stems are a dime a dozen. Bike enthusiasts often have several of them, for the very same reason I now found myself with two. It it important to try out multiple stem lengths before finding a good fit. I posted on the Twin Cities Bicycle Trading Post Facebook group offering to trade out the stems I had, or purchase a stem from another member. A very kind member offered to trade out one of his stems, since he had over 100 stems in his parts bin.
Voila! A 60 mm stem felt like a good fit! Now that I found a good stem length, I needed to set the handlebar height. Because I'm aiming for comfort over speed, I planned to set the handlebars pretty high. I could have chosen to leave the fork as-is, and put the handlebars all the way at the top, but this felt a little extreme. I played around with different handlebar heights, and found a height that felt good. Then, I added about a centimeter to that height just in case. (Once you cut the fork, you can't make it longer, but you can always make it shorter.) I decided that I would need 80mm of space in between the headset and stem. This meant that I would need 80mm of headset spacers.
Just for fun, I ordered a bright orange Wolf Tooth headset spacer from Angry Catfish, which is a bike shop in my neighborhood. Wolf Tooth is also a local Twin Cities company. They specialize in high-quality, brightly-colored bike parts. I ordered the tallest headset spacer they make, which is 30mm. Then, I headed over to The Hub to use their DIY space during Grease Rag Open Shop night. I picked up three more headset spacers: two 20mm and one 10mm. 30 + 20 + 20 + 10 = 80mm of spacers total.
Next, I needed to cut the extra length off of the top of my fork. With the guidance of one of the experienced mechanics at The Hub, I installed all of my spacers, put my stem on top, and then carefully marked the top of the stem using a sharp metal blade. On a steel bike, the top of the fork steering tube should be just a few millimeters below the top of the stem. Just to be safe, I opted to cut it a little longer than I actually needed. (Again, you can always cut it shorter if needed!) The mechanic showed me how to use this nifty tool that clamps onto the fork. As you spin it around, the sharp blade slowly cuts through the steel.

Unfortunately, this tool was not well-calibrated, and started making a spiral cut instead of cutting cleanly. Or maybe I wasn't using it correctly, I'm not sure. In any case, I decided to pay the professionals to do the job, since they have bigger and more efficient tools.
Once the fork was cut, I hammered in the "star-fangled nut" with the special star-fangled nut tool. This nut is a part that comes with the headset that gets jammed into the top of the steering tube. It goes in, but not out. It accepts the screw from the top of the headset, clamping everything together.

I re-installed the headset, spacers, and stem. I had to add an additional small spacer so that the steering tube rested slightly below the top of the stem. Then, I installed the headset cap and tightened it down. (Peep the matching bright orange headset cap, also purchased at Angry Catfish and made by Wolf Tooth).

Once I tightened it down, I had to loosen it back up and re-tighten, because the little wolf logo was not centered. And that was just not acceptable. Next, I centered my handlebars. Headset complete!


Comments